Complete guide for using Test2Go to create and manage assessments.
Welcome to Test2Go! This guide will help you create engaging assessments, manage participants, and analyze results.
/loginAfter installation, the default admin credentials are:
WARNING: Change this password immediately after first login!
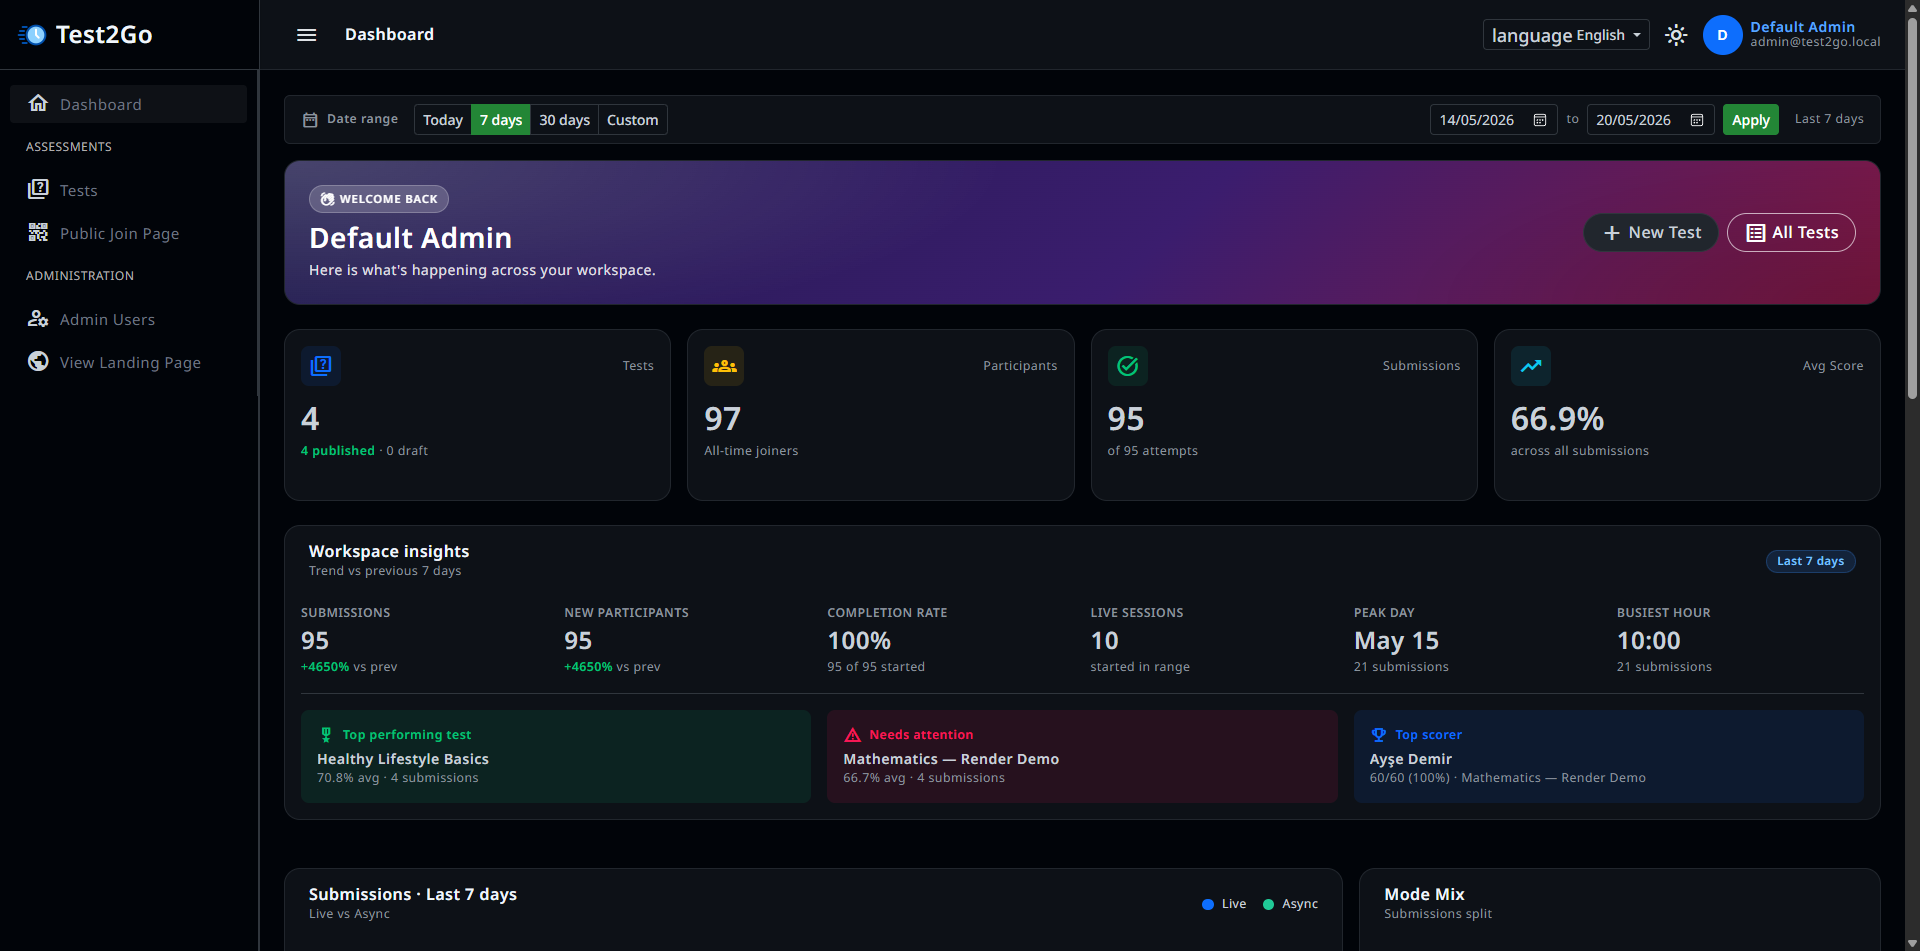
After logging in, you’ll see the admin dashboard with: - Summary statistics - Recent tests - Active sessions - Quick actions
At the top of the dashboard, you’ll see key metrics:
List of recently created or modified tests with quick actions:
Currently running live quiz sessions with:
Shortcut buttons to:
Click “Tests” in the sidebar or “Create Test” on the dashboard.
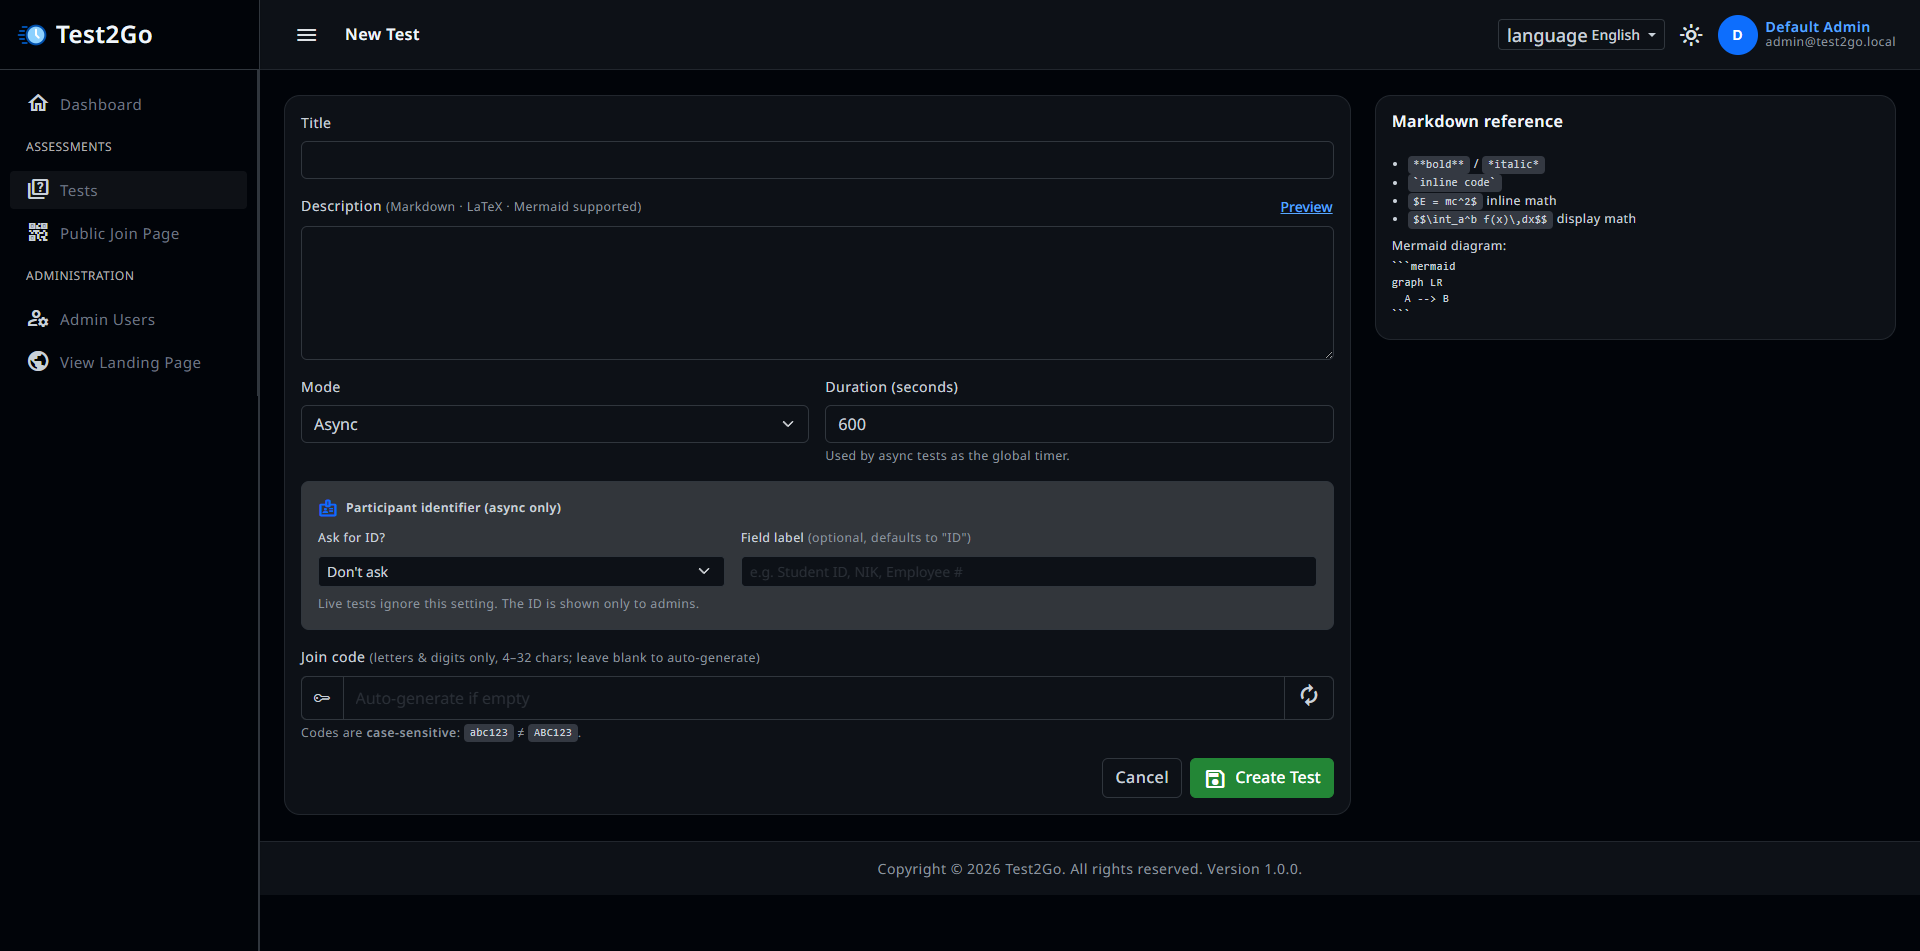
Required Fields:
For test Status: - Draft: Not visible to participants - Published: Can be joined using code - Archived: No longer active
You can publish the test if you already create questions.
Click “Create Test” button.
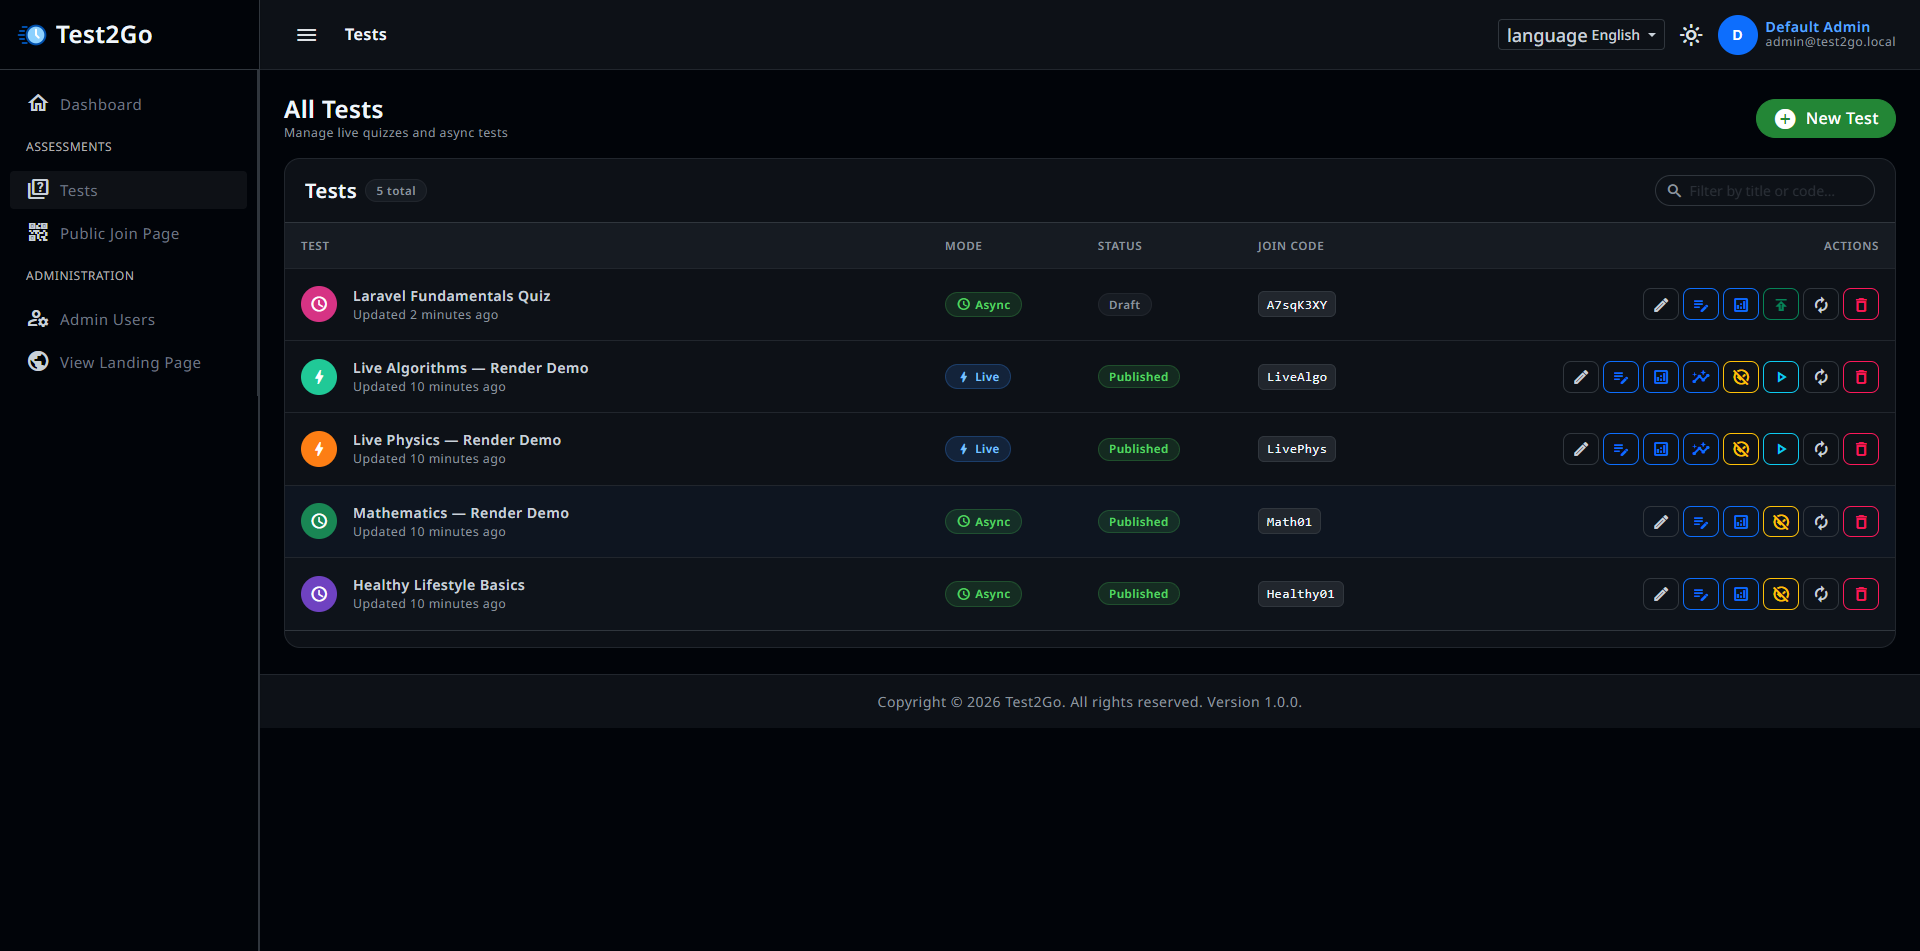
The tests list shows:
Note: You cannot change join code once created.
Now participants can join using the join code.
Participants can no longer join.
WARNING: Deleting a test will also delete all associated:
To delete:
Navigate the tests list /admin/tests.
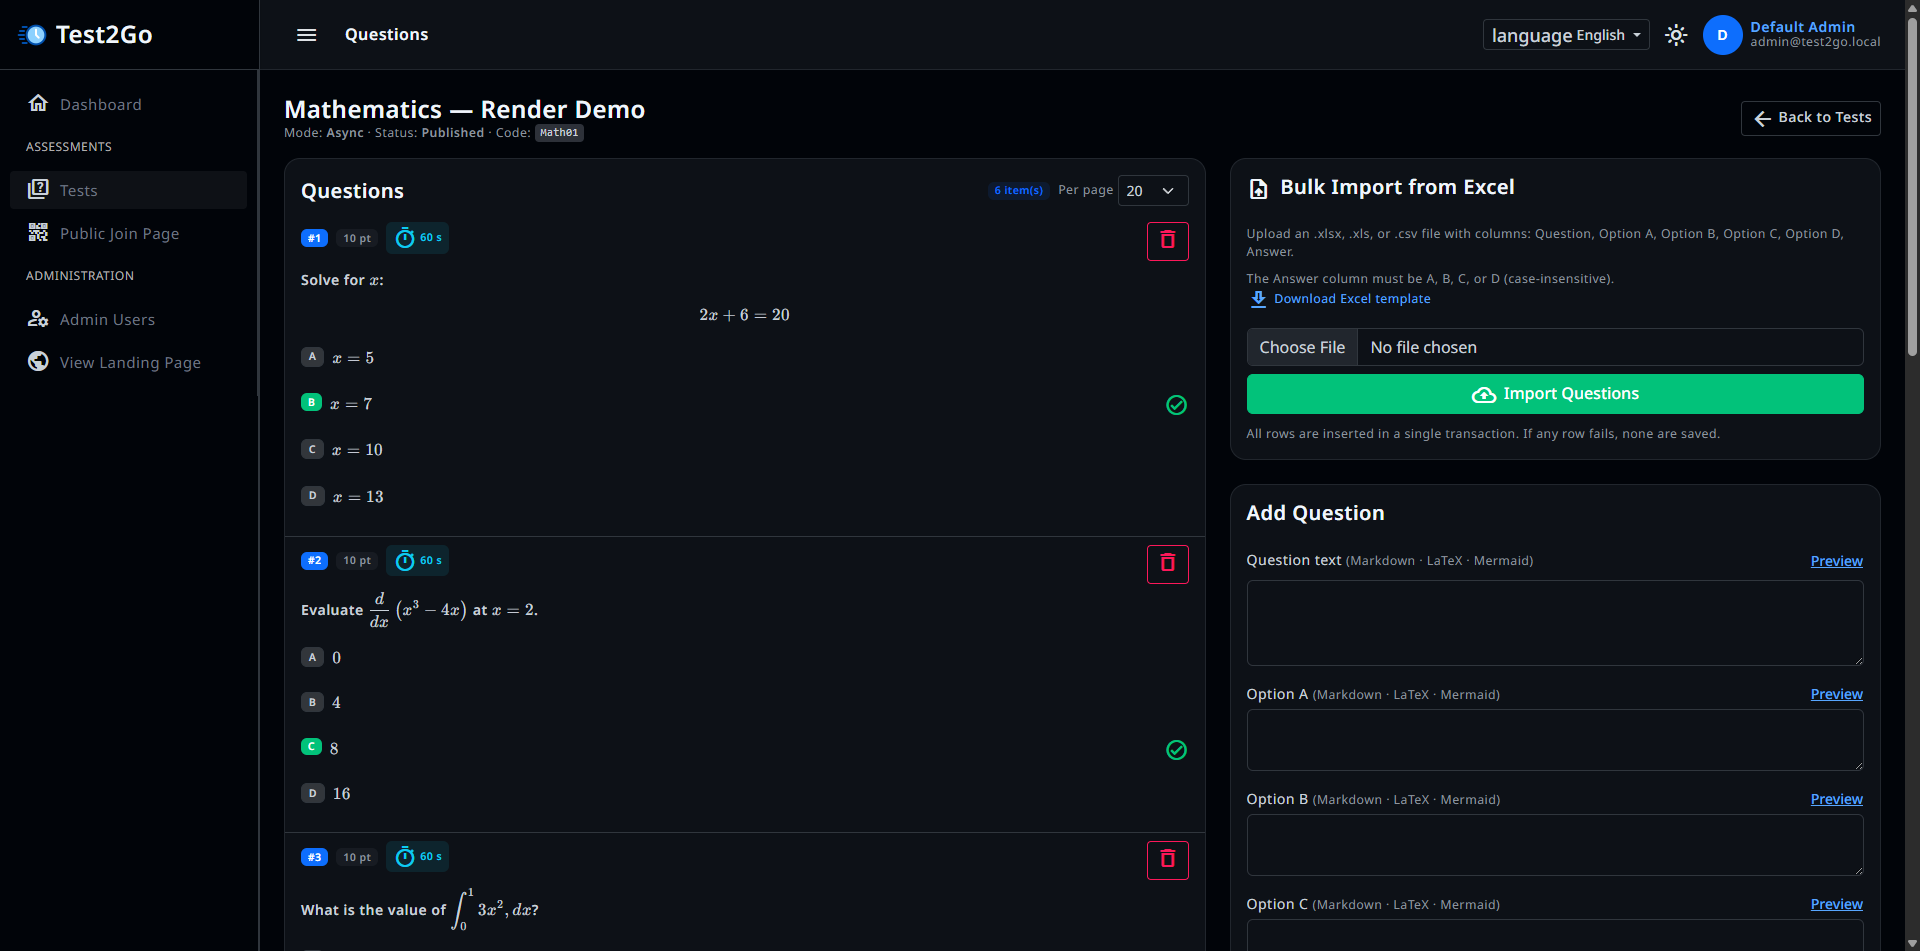
Click “Questions” icon on a test.
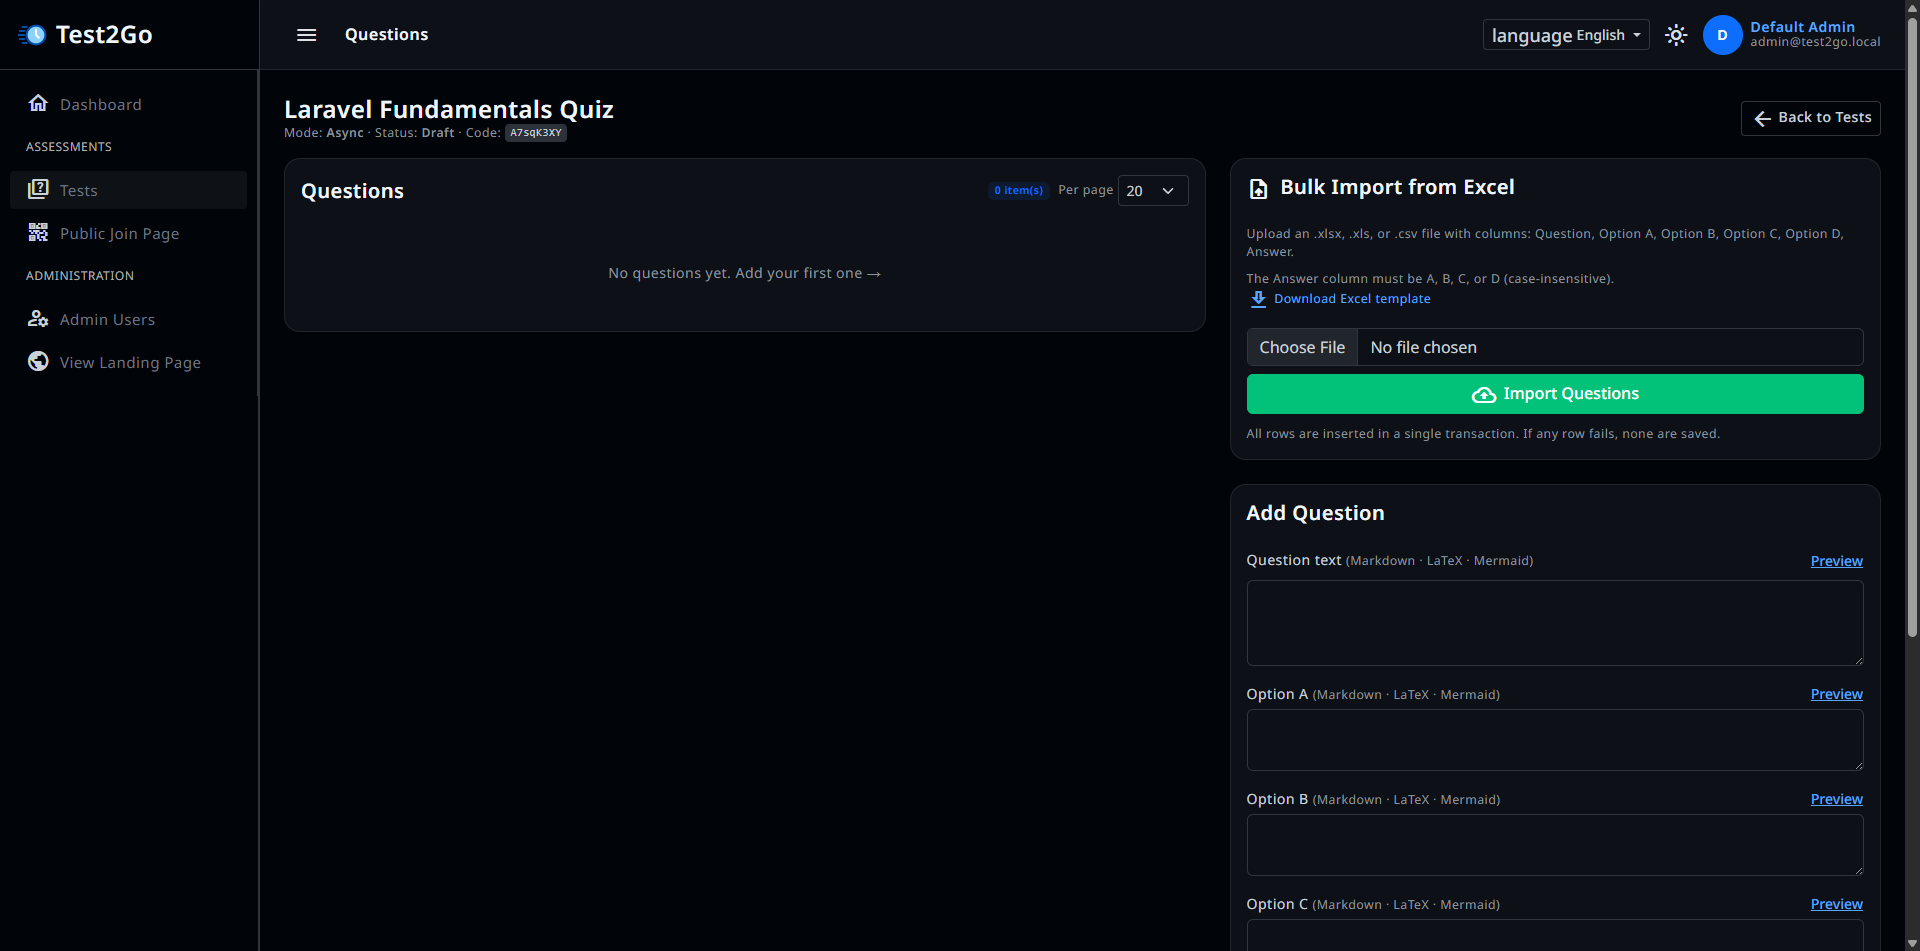
Question Fields:
All questions and options are currently supported as markdown text. You can use markdown formatting for better presentation.
Click “Add Question” button.
The questions list shows: - Question number and text - Correct answer - Points - Time limit - Actions (Edit, Delete, Reorder)
Note: Deleting a question does not affect past attempts.
You can import questions from a Excel/CSV file. You can download the template from the “Import Questions” section.
Live quizzes are interactive, instructor-led sessions where you control the flow of questions.
Go to Tests and select a Live mode test.
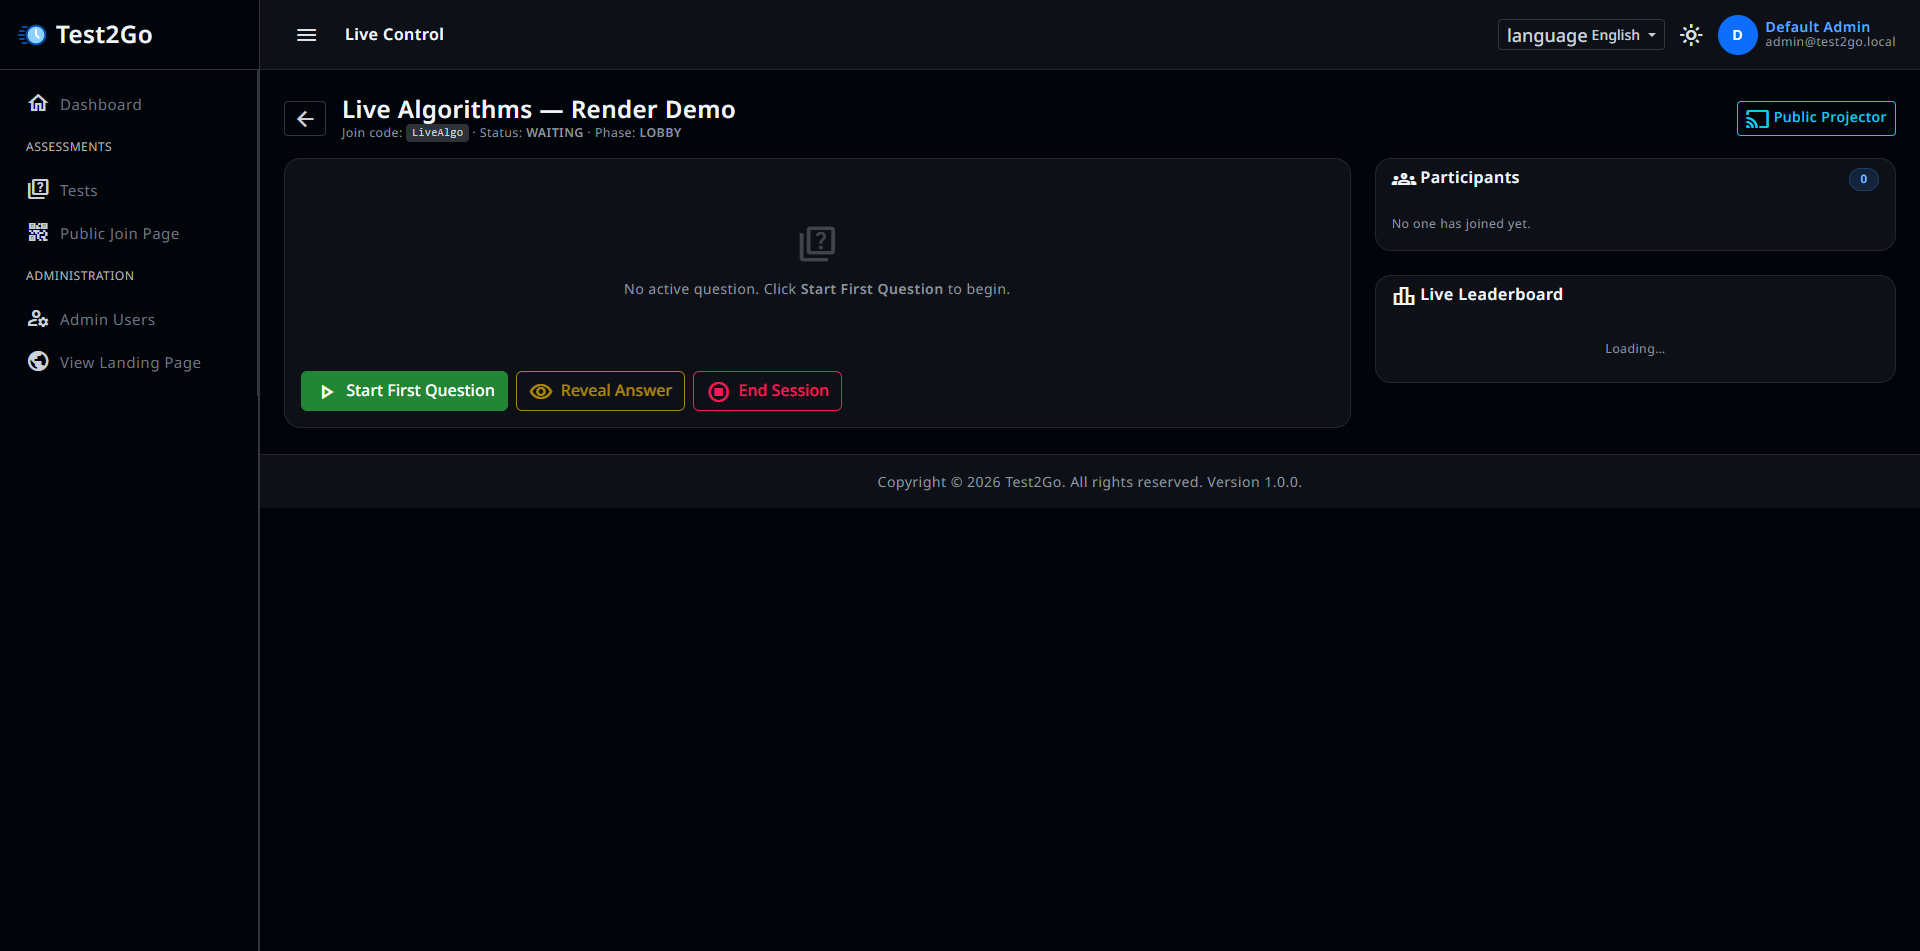
Click “Start Live Session” button.
Display the join code to participants: - Show on projector - Write on whiteboard - Send via chat
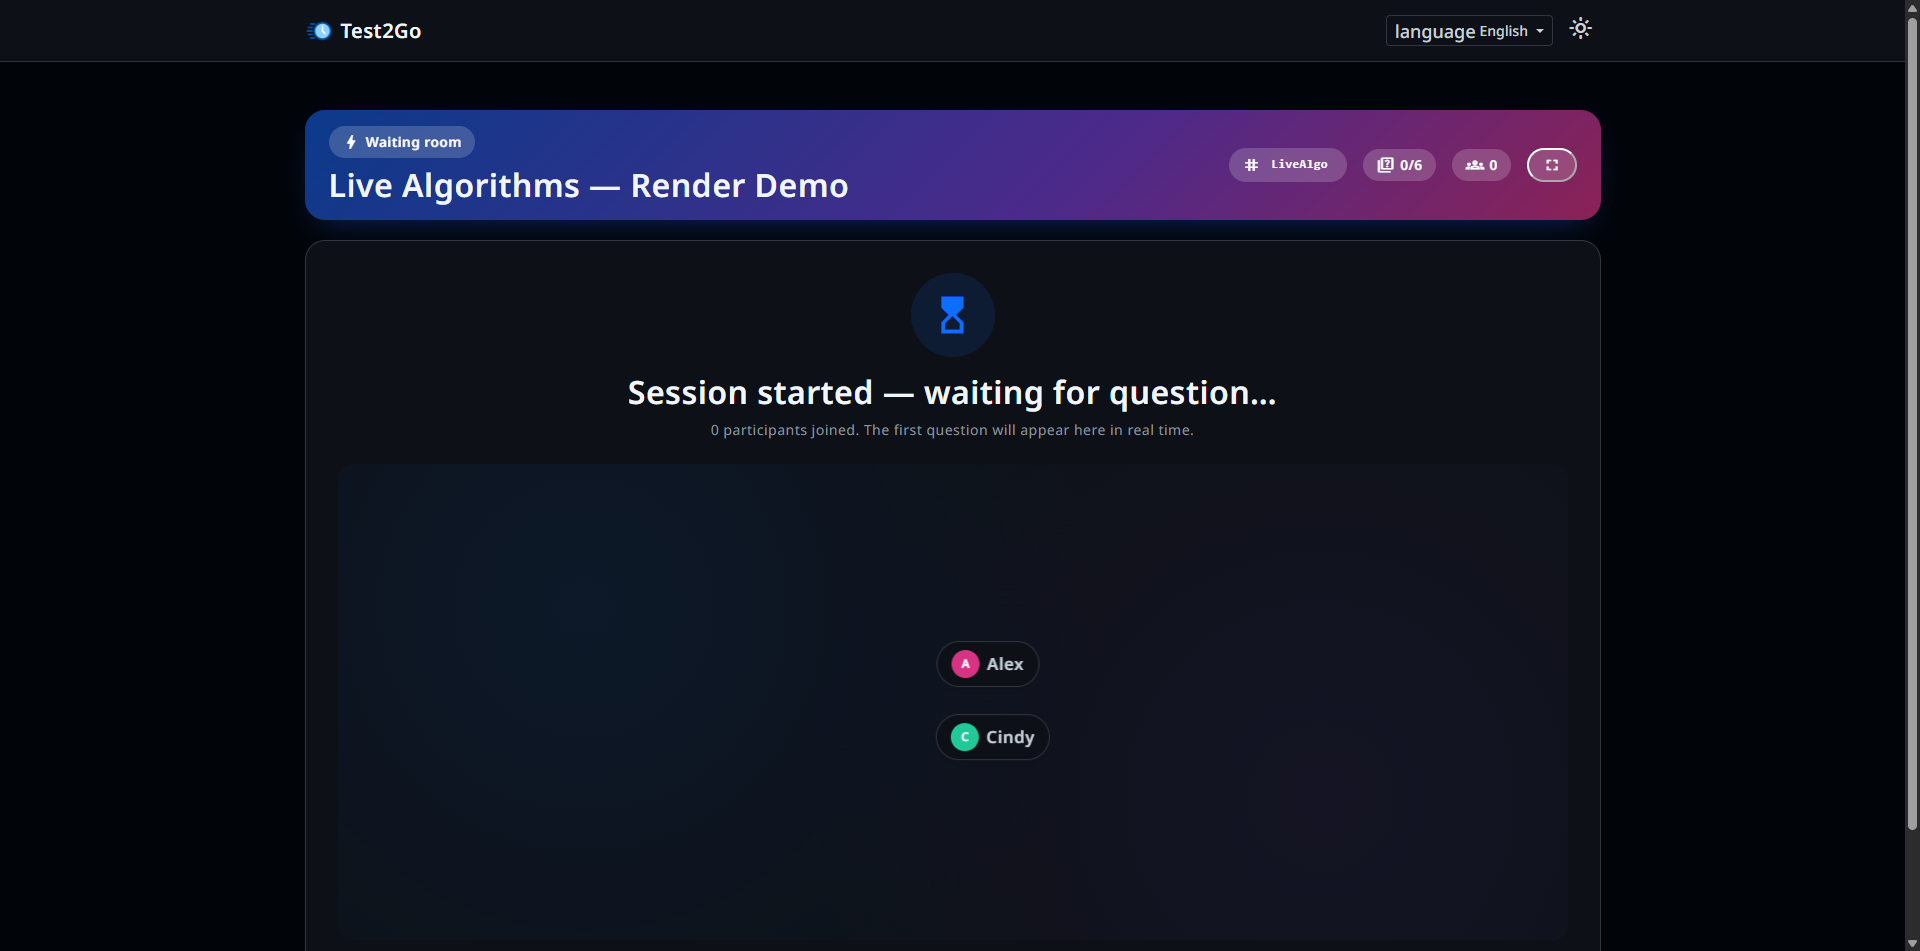
In the lobby, you see: - Join code (large display) - List of participants who have joined - Participant count
Wait for participants to join before starting.
During the quiz, you have full control: - Move to next question - End session at any time - View participant answers and statistics
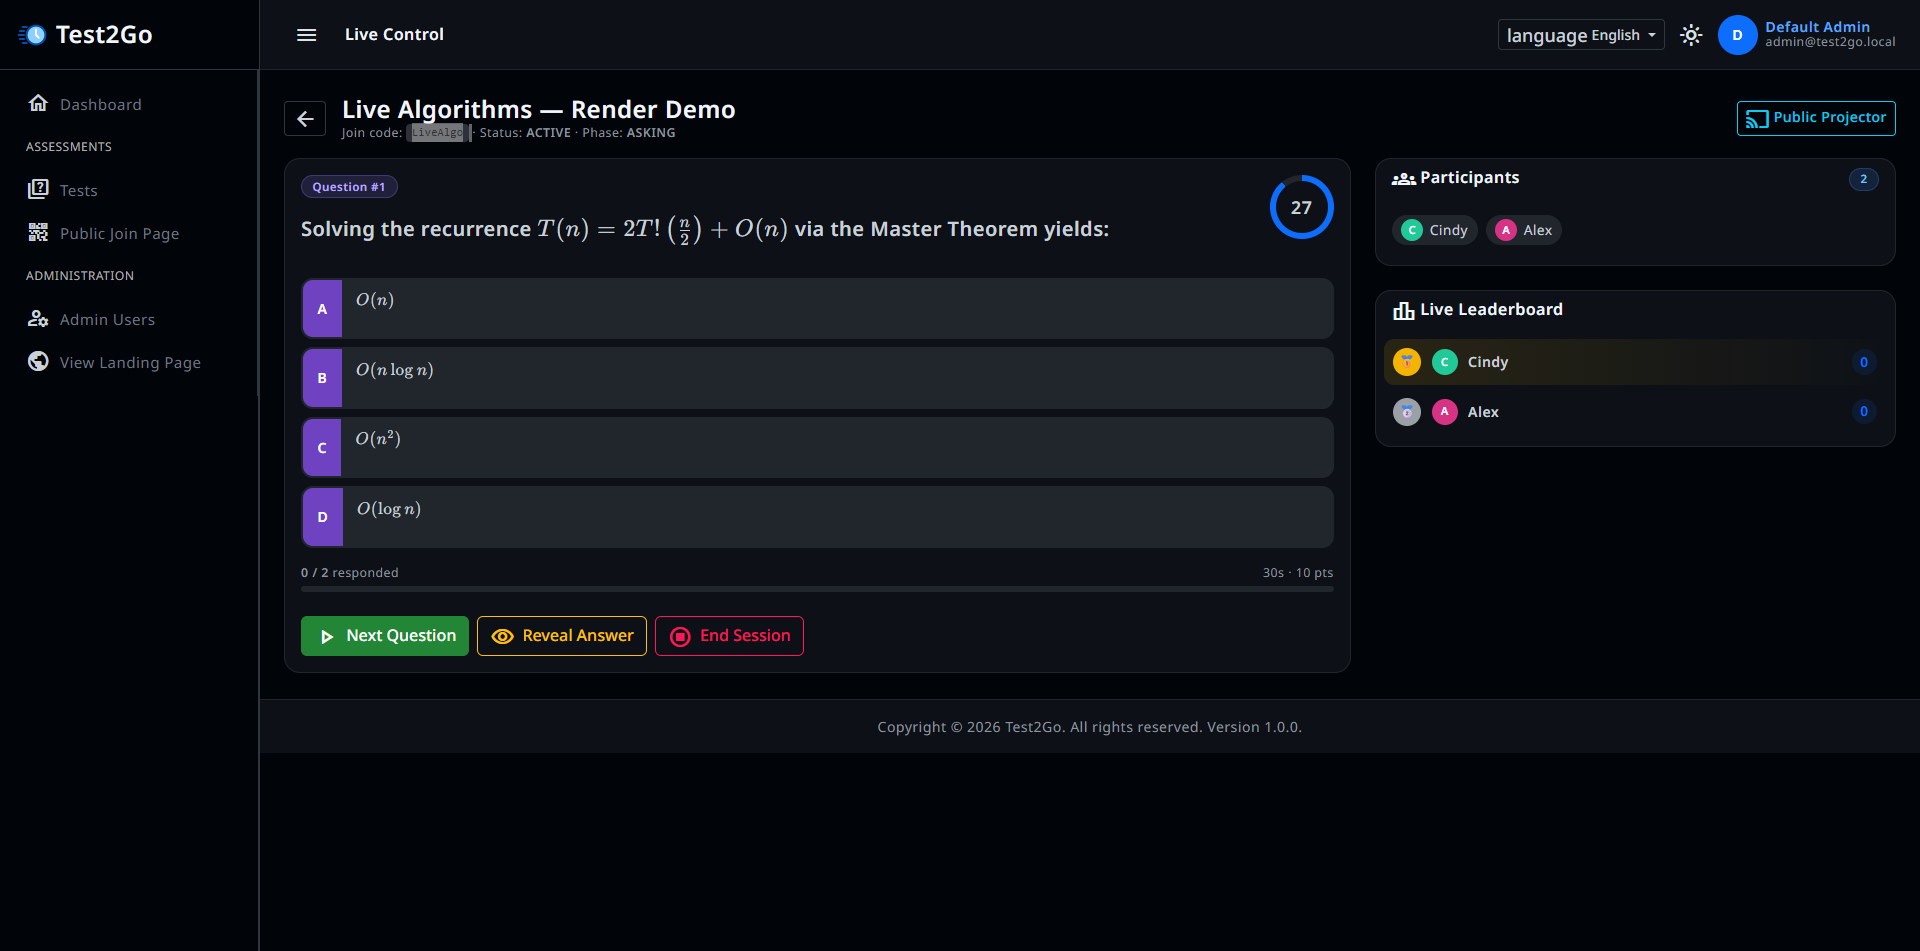
You see: - Current question - Time remaining - Participant answer statistics - Live leaderboard - Next question button - End session button
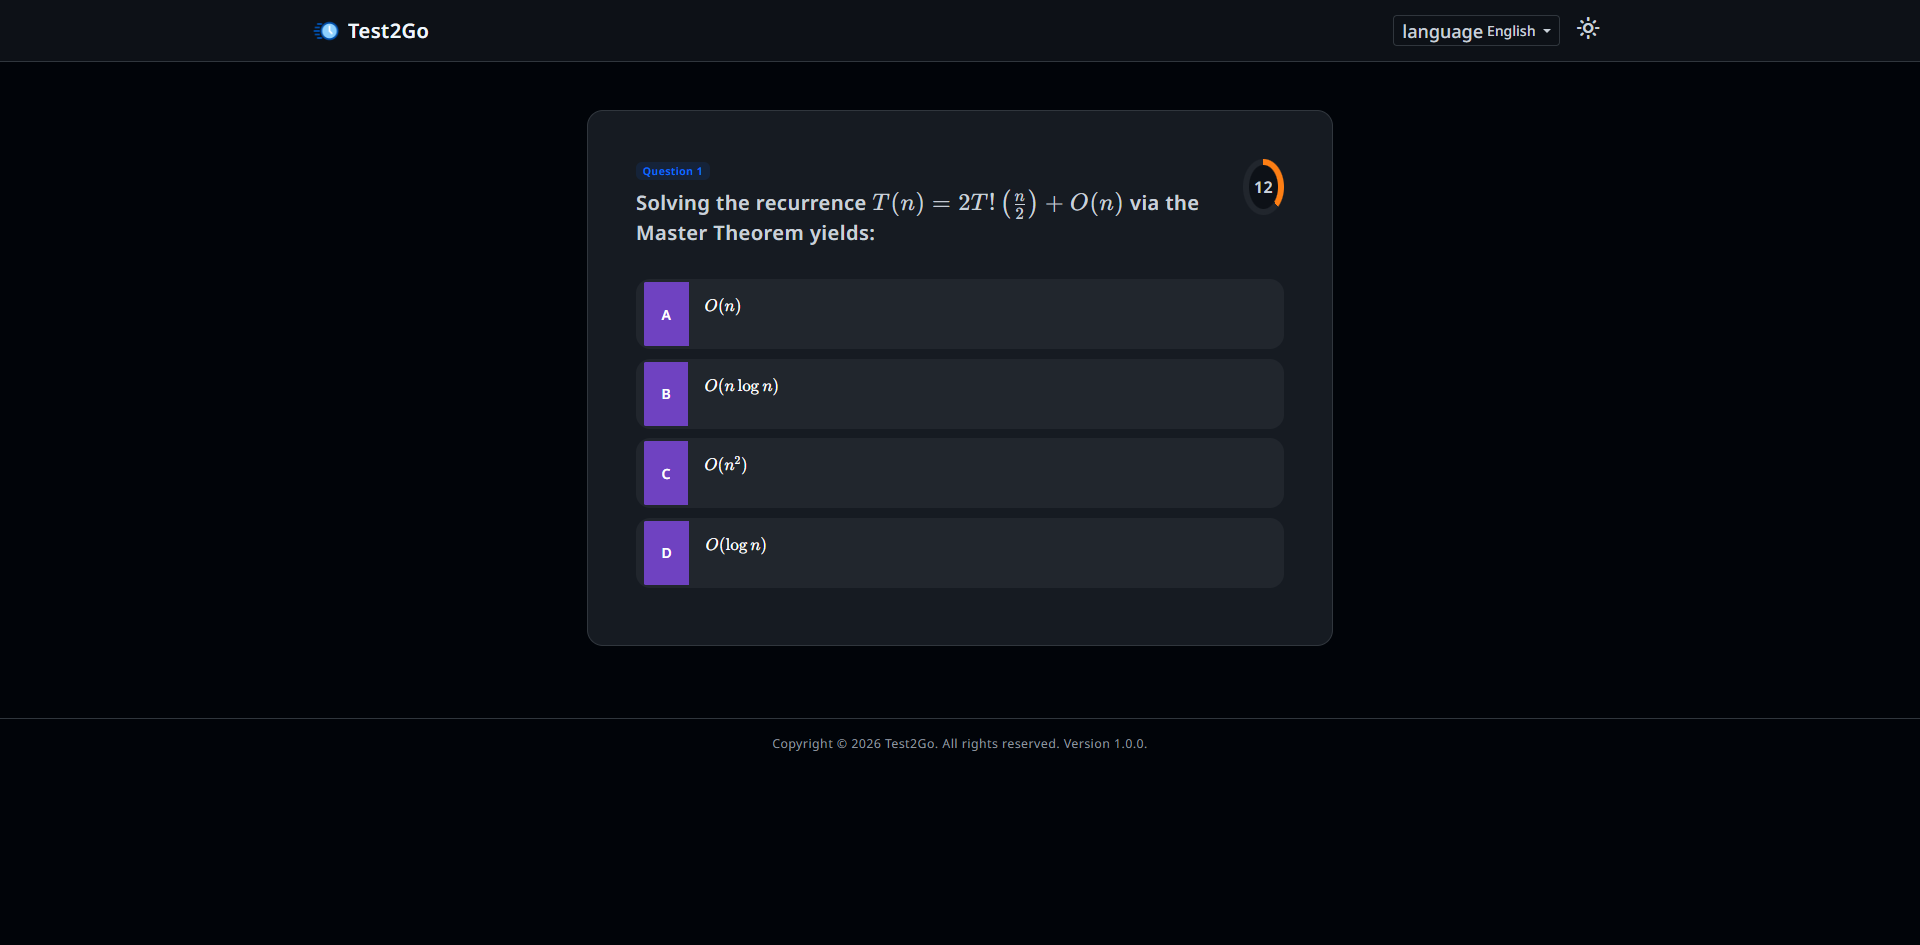
Participants see: - Current question - Answer options (large buttons) - Time remaining - Their current score
You can also display the quiz on a projector for better visibility. Participants can join using their phones and see the same interface with: - Current question - Answer options (large buttons) - Time remaining - Their current score
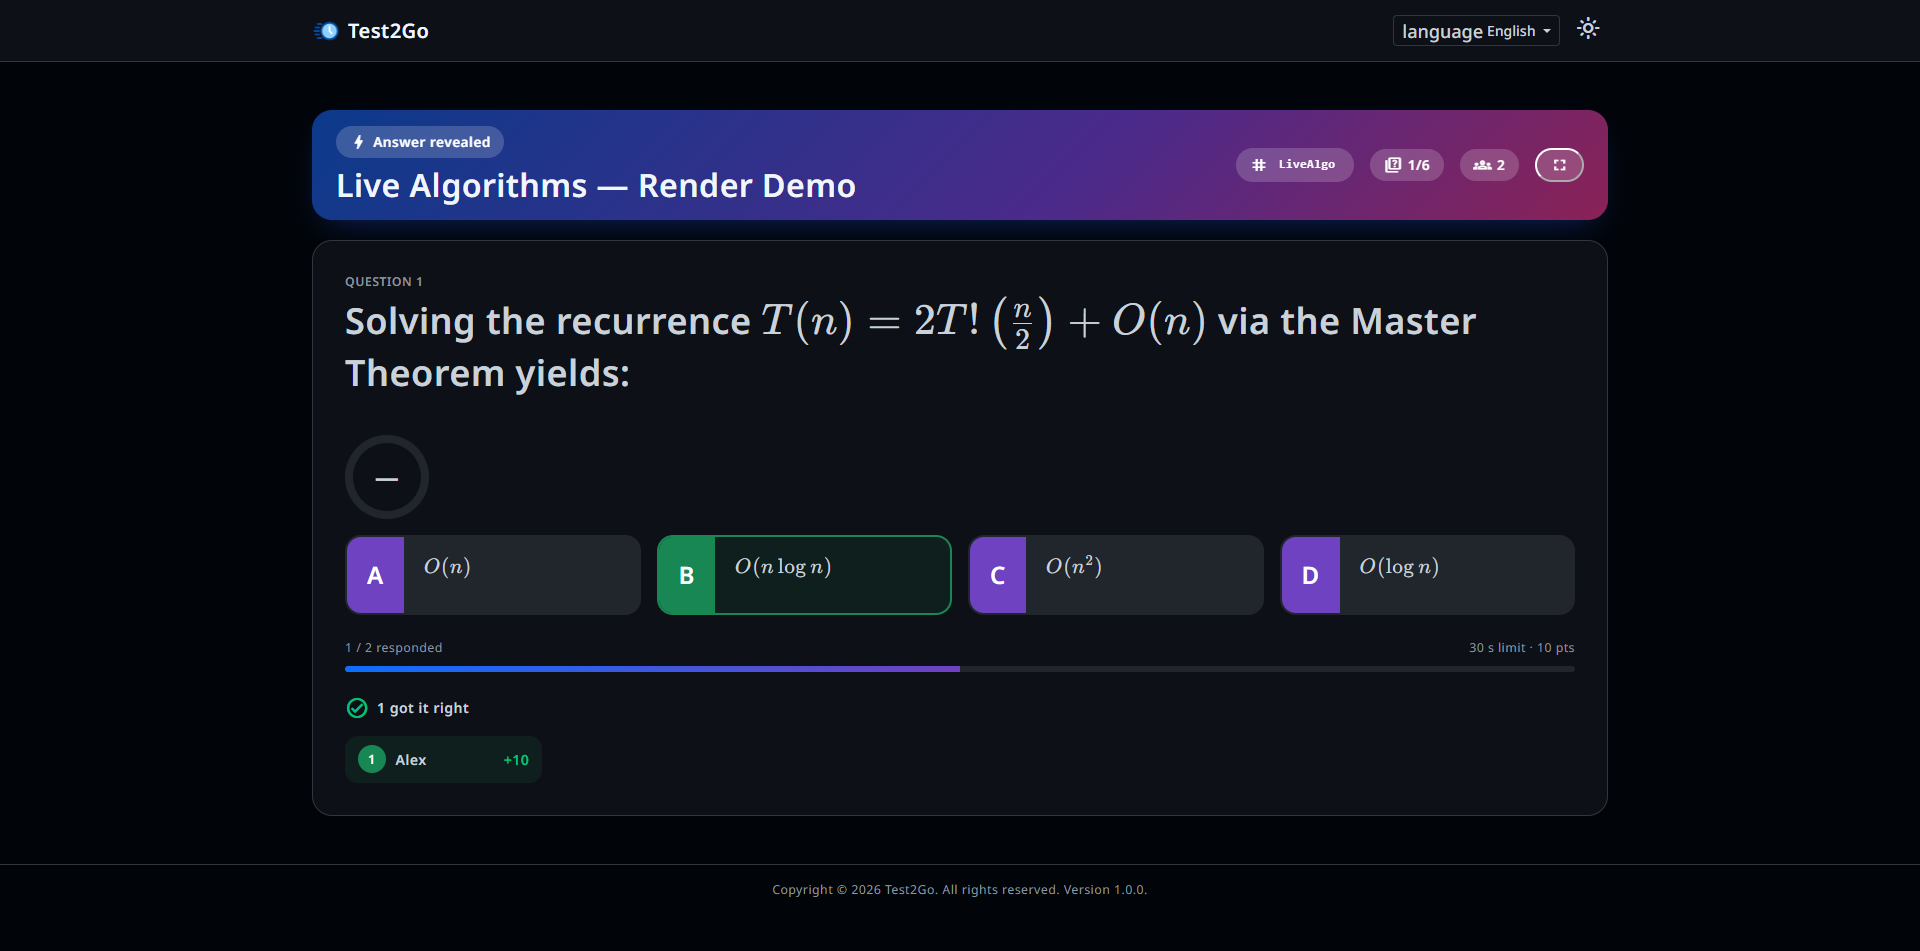
The leaderboard updates in real-time showing: - Participant names - Current scores - Ranking
Display this to create competition!
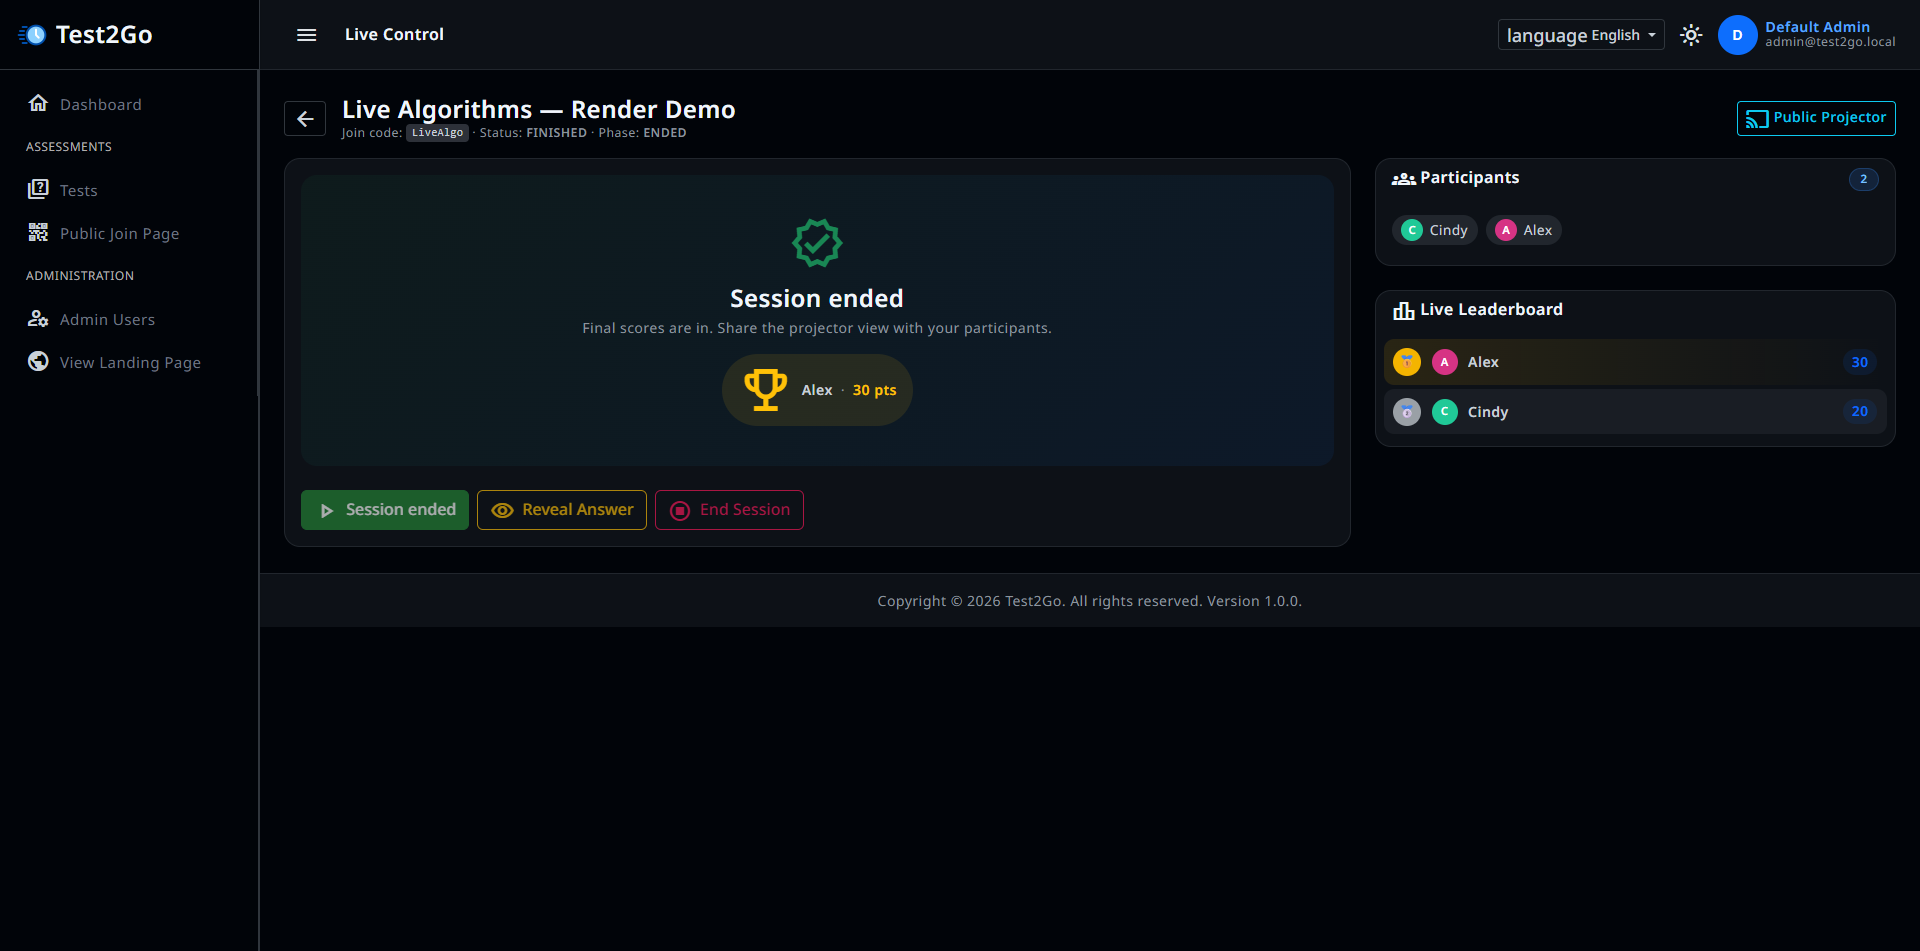
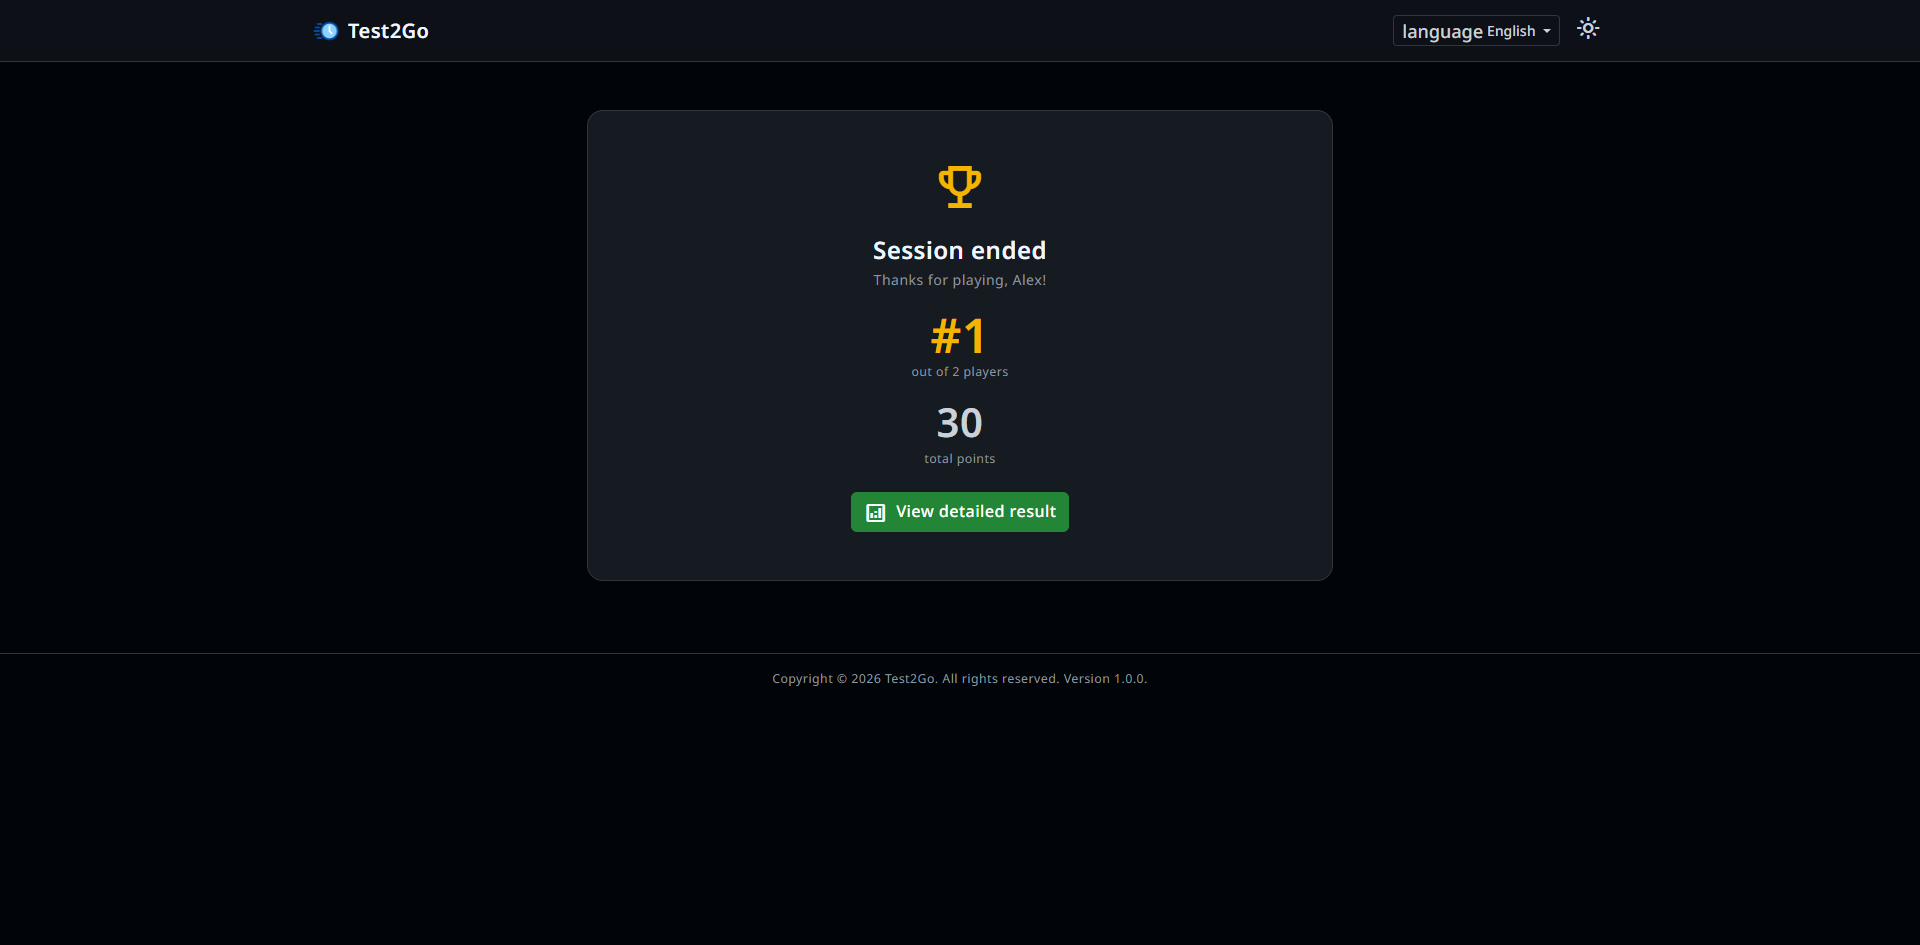
You can see the result on projector and also participants can see their results on their devices.

User can see their final score, ranking, and correct answers on their device.
✓ Do: - Test your questions beforehand - Have questions ready before starting - Use a projector for better visibility - Keep time limits reasonable (20-30 seconds) - Show leaderboard between questions
❌ Don’t: - Start without testing join code - Rush participants - End session prematurely - Use too many questions (10-15 is ideal)
Async tests are self-paced assessments where participants take the test independently with a global timer.
Share the join code with participants via: - Email - Learning management system - Printed on exam papers - Posted on notice board
View participants currently taking the test:
You can see: - Participant name - Time remaining - Progress (questions answered) - Current score
When time expires, attempts are automatically submitted with: - Status: “Auto-submitted” - Score calculated for answered questions - Unanswered questions marked as wrong
After submission, view: - Final scores - Time taken - Correct/wrong count - Individual answers
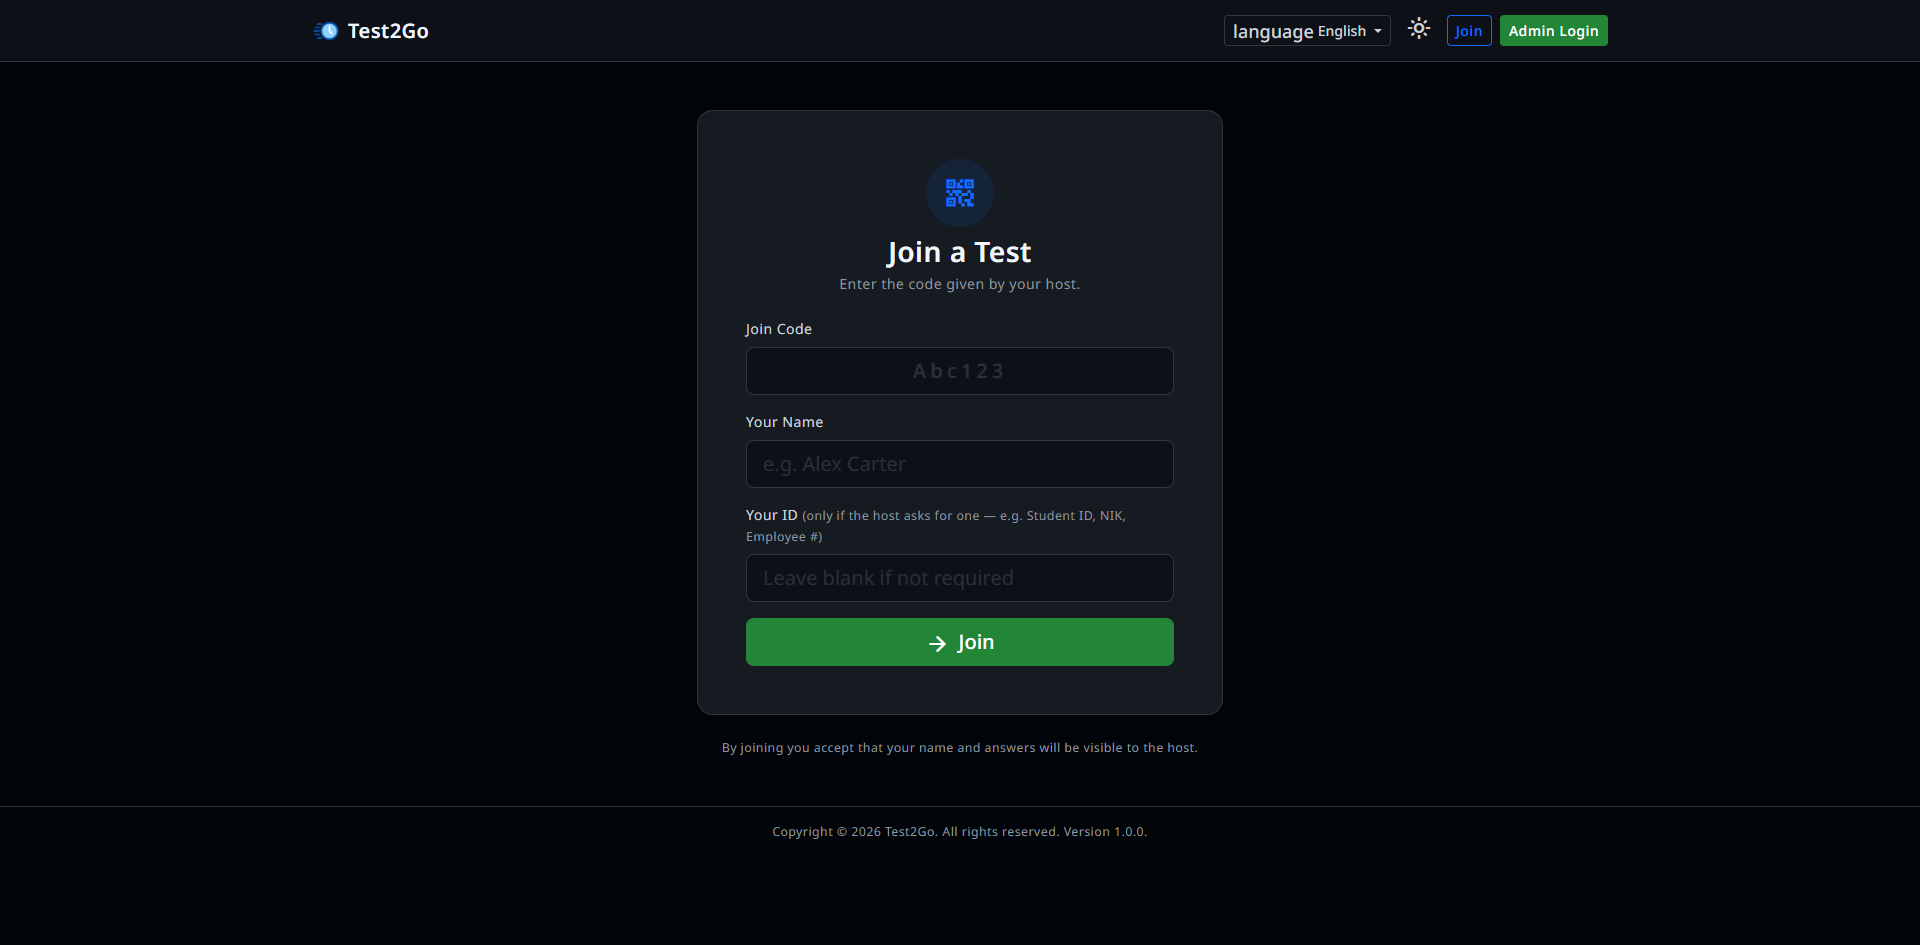
Participants go to your Test2Go URL or /join.
Participants enter: - Join Code: Provided by admin - Name: Their name (no account needed) - User ID: Optional field for tracking (e.g., student ID)
Click “Join” button.
After joining a live quiz:
After joining an async test:
Test2Go is mobile-friendly. Participants can join using: - Smartphones - Tablets - Any device with a browser
View overall test performance:
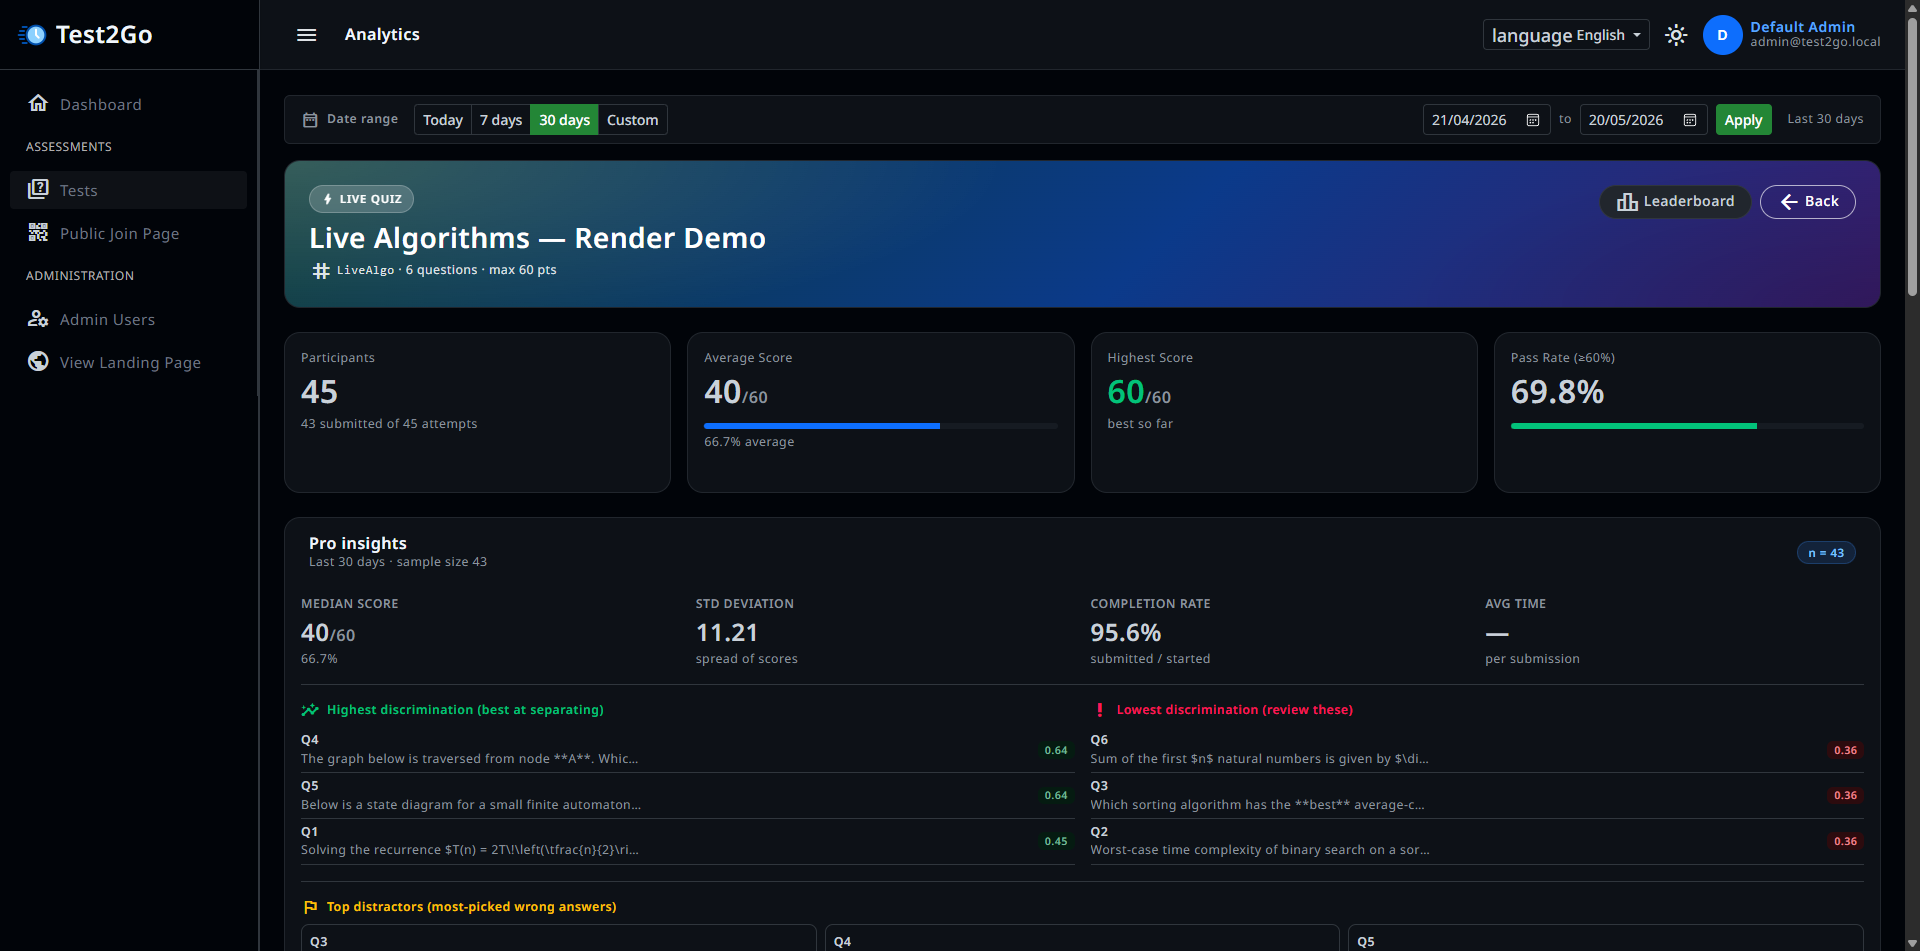
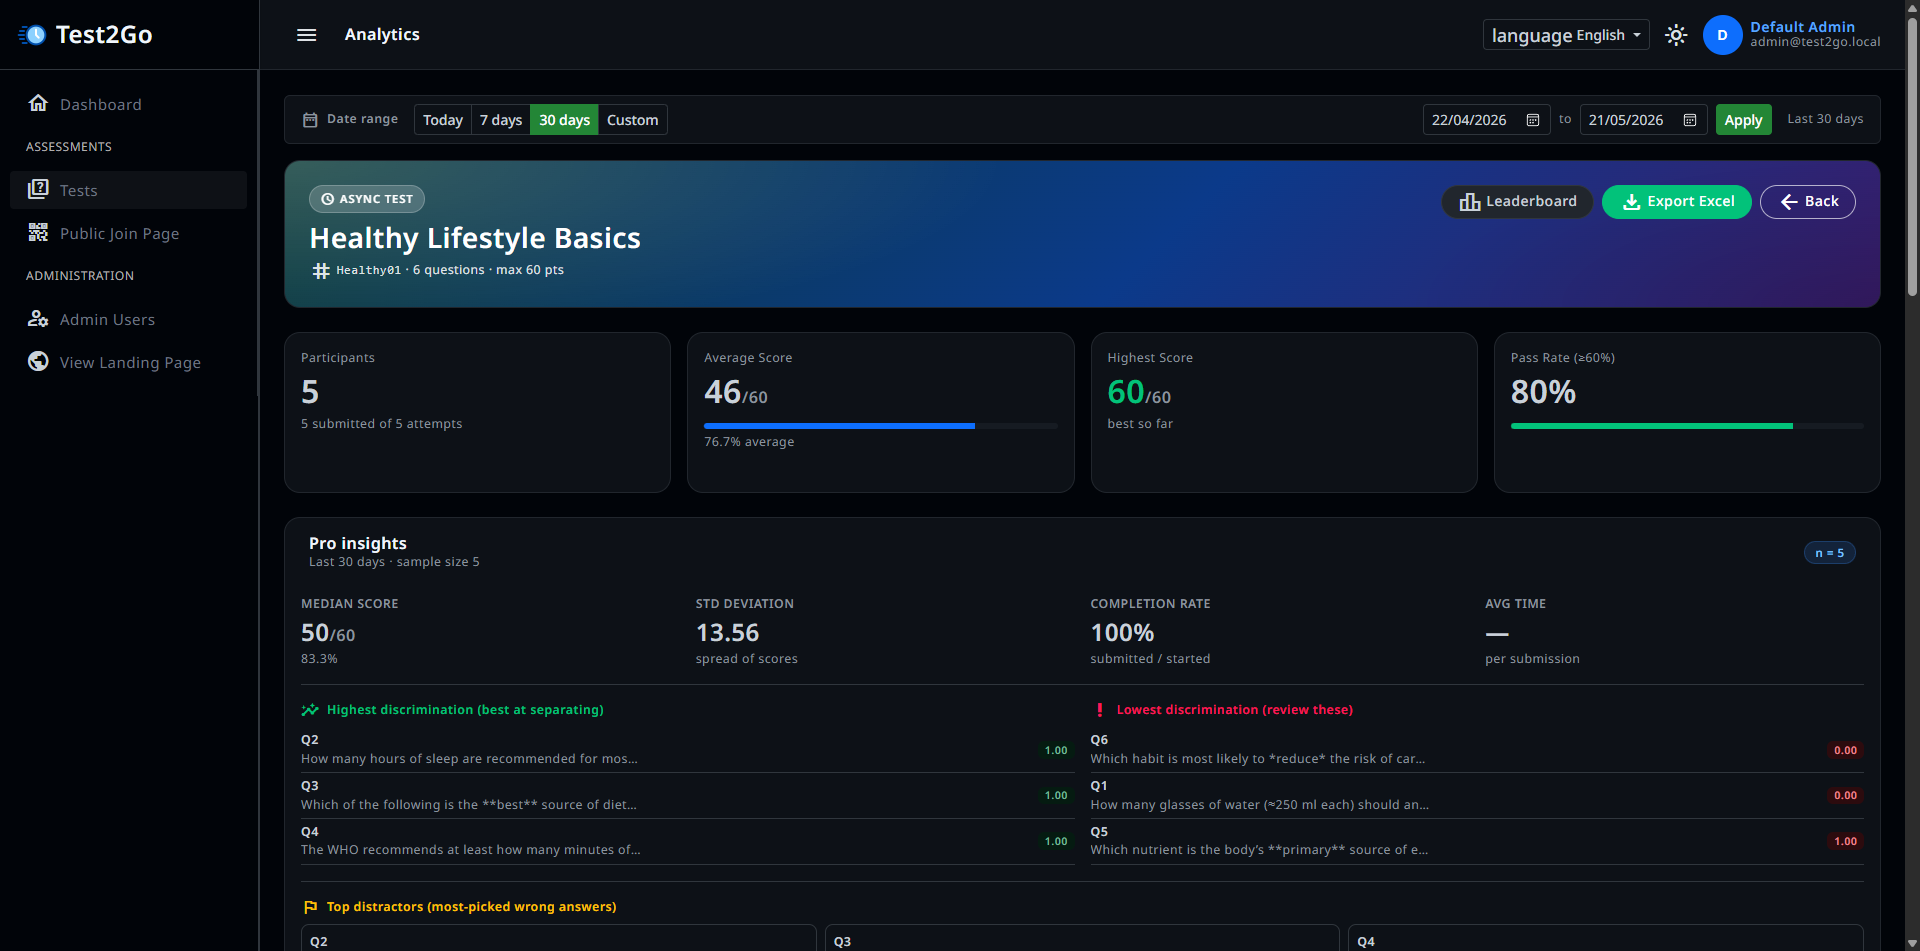
Metrics shown: - Total participants - Average score - Highest score - Lowest score - Pass rate (if configured) - Completion rate
View ranking of all participants:
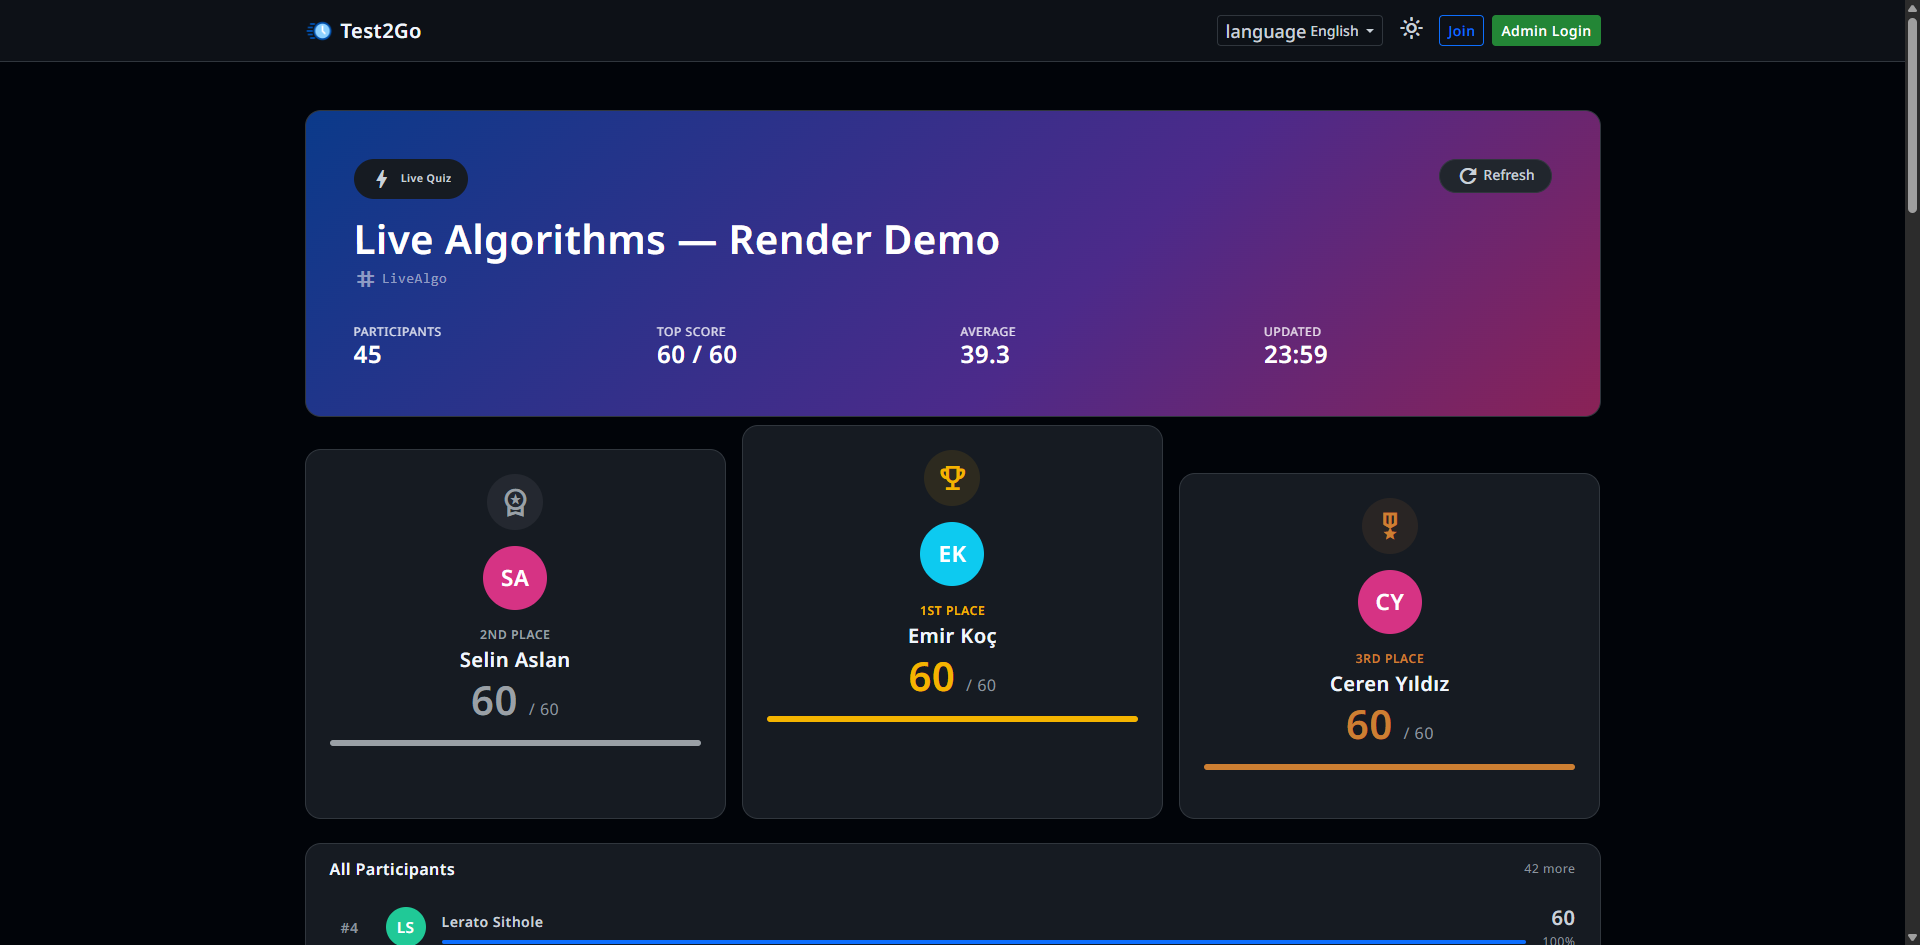
Sorted by: 1. Score (descending) 2. Submission time (ascending - faster submissions rank higher for ties)
Export results to Excel (CSV).
View detailed analytics for each test:
For each question, see: - Accuracy: Percentage who answered correctly - Response Count: Total responses - Average Time: Time taken to answer - Option Distribution: How many chose each option
Chart showing distribution of scores: - X-axis: Score ranges - Y-axis: Number of participants
For tests taken multiple times: - Average score trends - Participation trends - Improvement over time
Main dashboard shows: - Total tests created - Total participants (all-time) - Active sessions - Today’s activity - Recent test performance
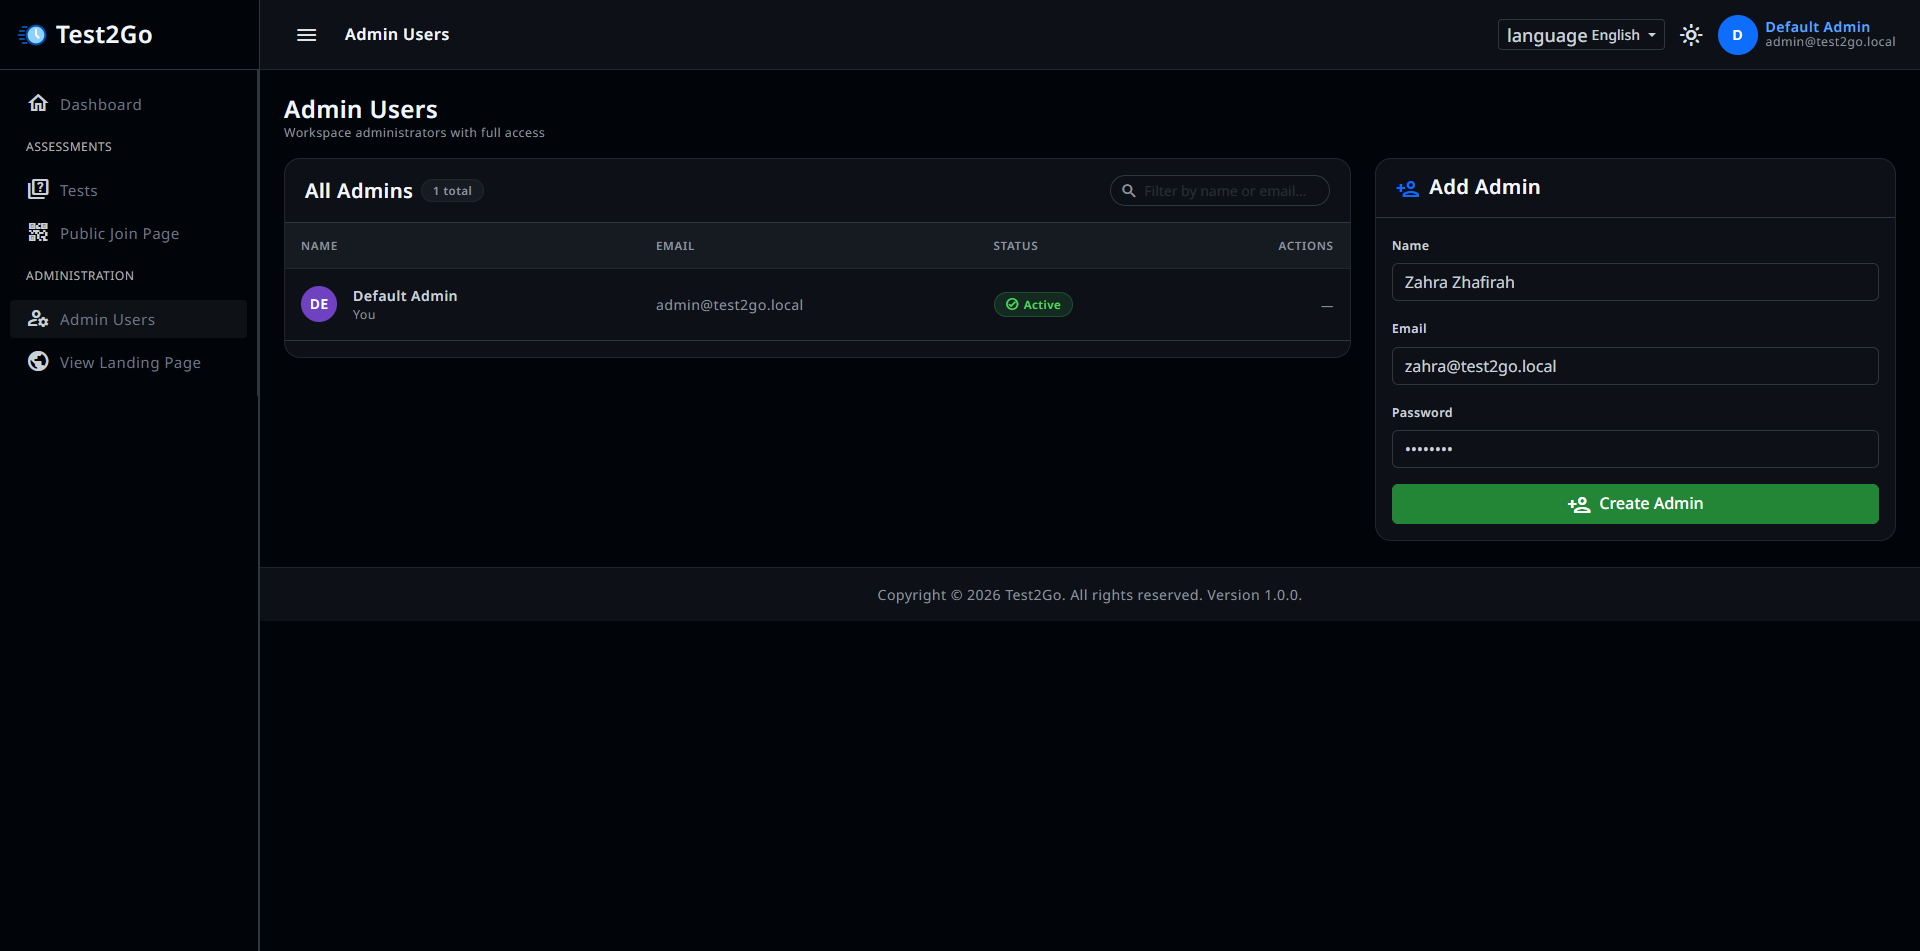
Navigate to “Users” in the sidebar.
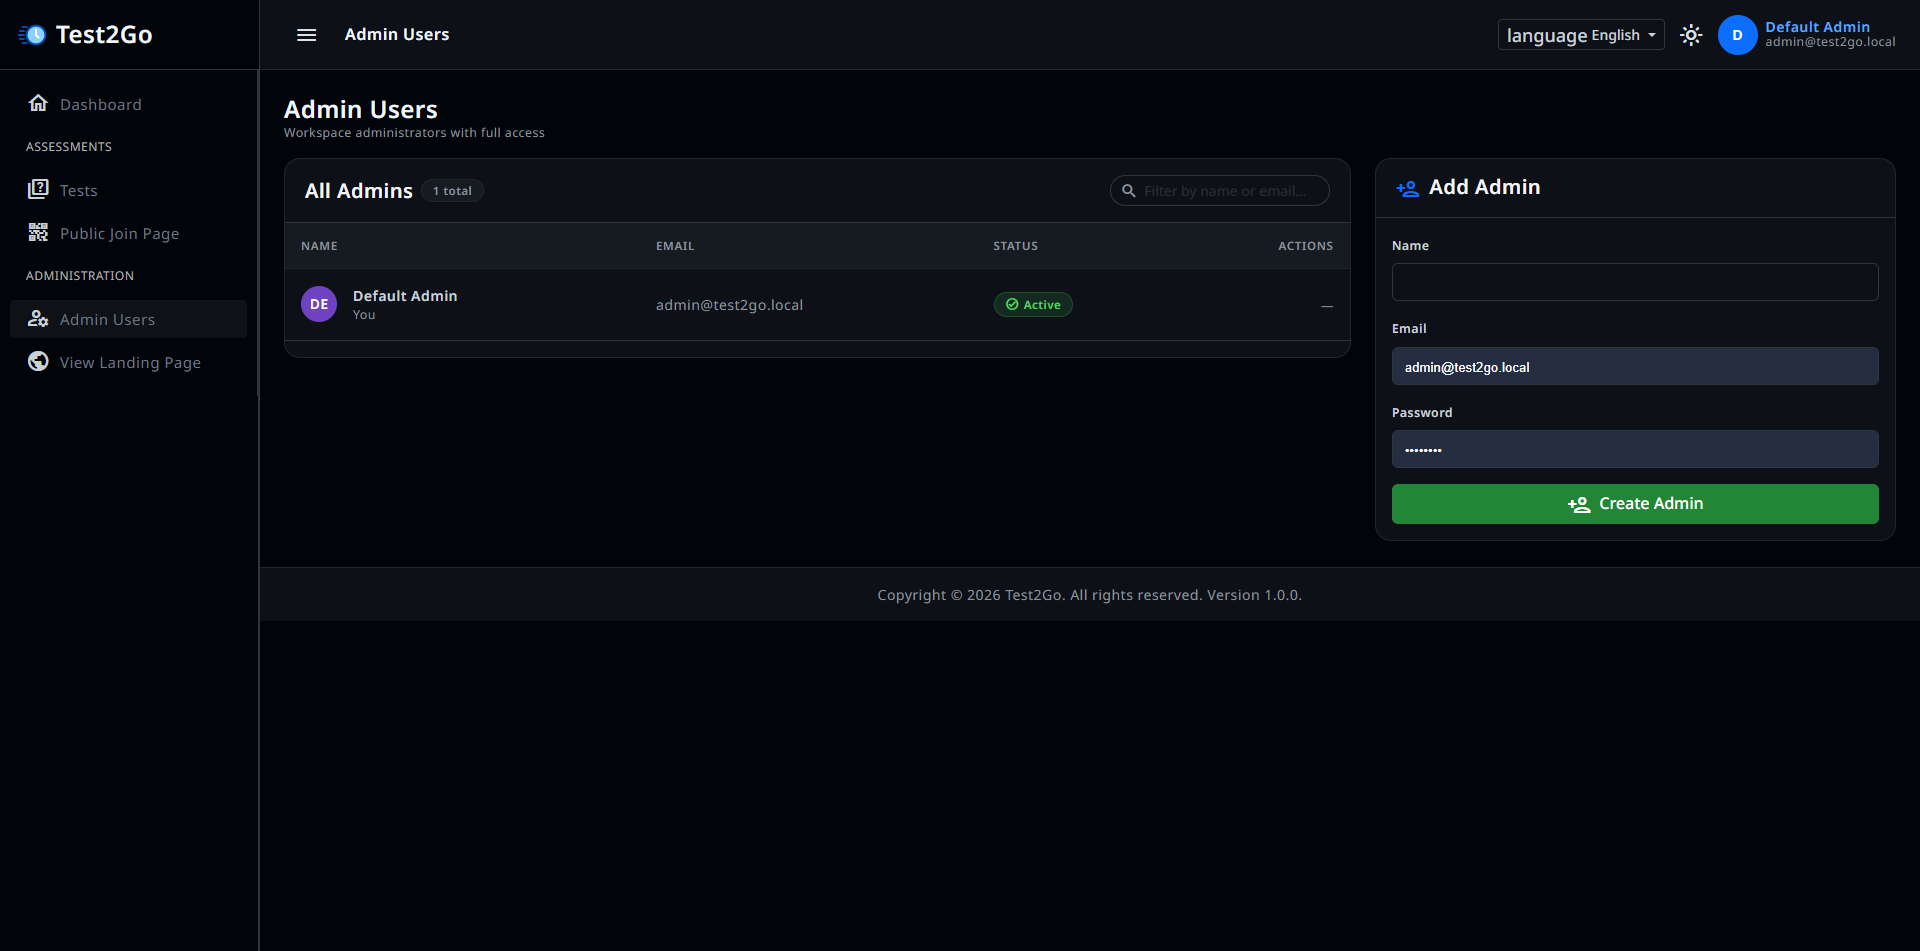
You’ll see all admin users with: - Name - Email - Status (Active/Inactive) - Last login - Actions
Inactive users cannot log in but are not deleted.
WARNING - Admin Lockout Prevention: - You cannot deactivate yourself - You cannot deactivate the last active admin - At least one admin must remain active
You can delete admin user by clicking “Delete” and confirming.
As an admin, you can reset another admin’s password:
Problem: Login fails with correct credentials.
Solutions: 1. Check if account is active (ask another admin) 2. Try password reset 3. Check caps lock 4. Clear browser cache 5. Contact system administrator
Problem: Participants get error when entering join code.
Solutions: 1. Verify test is Published (not Draft/Archived) 2. Check join code is correct (case-insensitive) 3. Verify internet connection 4. Try different browser 5. Check rate limiting (too many attempts)
Problem: Participants don’t see new questions.
Solutions: 1. Check internet connection 2. Refresh participant browsers 3. Check polling interval setting 4. Restart session if necessary
Problem: Timer doesn’t count down.
Solutions: 1. Refresh browser 2. Check JavaScript is enabled 3. Try different browser 4. Check system time is correct
Problem: Questions appear in wrong order.
Solutions: 1. Edit questions and check order numbers 2. Ensure order numbers are sequential 3. Re-save questions if needed
Causes: - Too many participants - Slow server - Poor internet connection
Solutions: 1. Upgrade server resources 2. Enable caching 3. Optimize database 4. Use CDN for assets
Causes: - High polling frequency - Server overload - Database queries
Solutions: 1. Increase polling interval (in
.env) 2. Enable database caching 3. Optimize queries
If you encounter issues not covered here:
Q: Do participants need to create accounts?
A: No, participants join using just a code and their name.
Q: Can I reuse a test?
A: Yes, you can run the same test multiple times.
Q: Is there a limit on participants?
A: Depends on your server capacity. Generally, 50-100 concurrent users
is fine.
Q: Can I edit a test while it’s running?
A: Not recommended. Changes may not reflect in active sessions.
Q: Can I go back to a previous question?
A: No, live quizzes move forward only.
Q: What if I skip a question?
A: Click “Next Question” without waiting. Participants can’t answer
anymore.
Q: Can participants join mid-session?
A: They can join but only see current and future questions.
Q: Can I pause a live quiz?
A: No pause feature. Don’t start next question if you need a break.
Q: Can participants pause the test?
A: No, timer runs continuously once started.
Q: Can participants review questions before
submitting?
A: Yes, they can navigate between questions.
Q: What happens if time runs out?
A: Test auto-submits with current answers.
Q: Can I extend time for a participant?
A: Not in V1. Set generous time limits initially.
Q: Can I change the score after submission?
A: Not in V1. Manual grade adjustment is a future feature.
Q: When do participants see results?
A: Immediately after submission for both modes.
Q: Can participants see correct answers?
A: Yes, after submission they can review.
Q: How is the leaderboard ranked?
A: By score (descending), then by submission time (ascending).
Q: What browsers are supported?
A: Modern browsers: Chrome, Firefox, Safari, Edge.
Q: Does Test2Go work offline?
A: No, internet connection required.
Q: Can I customize the look?
A: Advanced users can modify CSS/templates. See App Documentation.
Q: Is Test2Go mobile-friendly?
A: Yes, responsive design works on all devices.
Q: How many admin users can I have?
A: Unlimited, but at least one must be active.
Q: Do admins share tests?
A: Yes, all admins access all tests in V1.
Q: Can I transfer test ownership?
A: Not needed in V1 since workspace is shared.
Q: How do I backup data?
A: See Deployment Guide for database backup instructions.
Congratulations! You now know how to use Test2Go effectively.
Happy Testing!
Last updated: May 2026